Custom Assets
Historically, AssetAsyst has always focused on a small number of pre-defined asset types (roads, paths, bridges & culverts and buildings) and providing the benefit of pitt&sherry’s engineering expertise. There is sometimes, however, the need to manage simpler asset types. The custom assets module will allows users to define their own custom asset types.
Assets of these types can then be created. Data can be logged against them by use of custom fields, and defects can be identified and resolved using inspections and work orders.
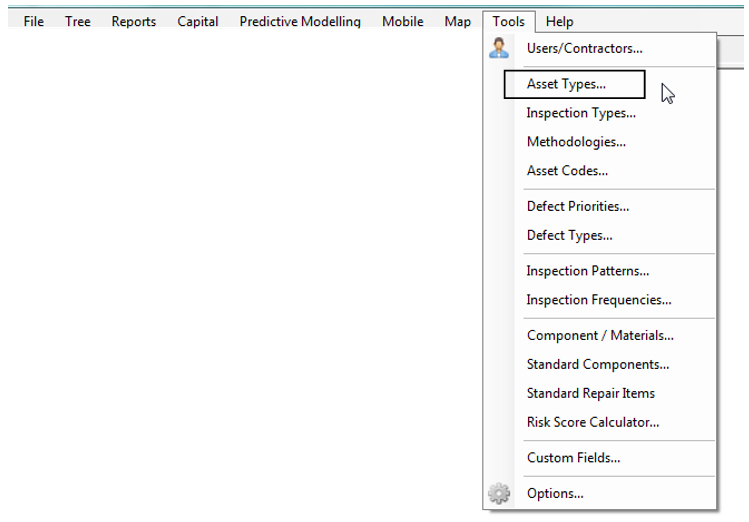
Asset types will be defined from the Tools menu.
 New asset types will be defined by clicking the Add button. Behaviour can be assigned (such as point or linear).
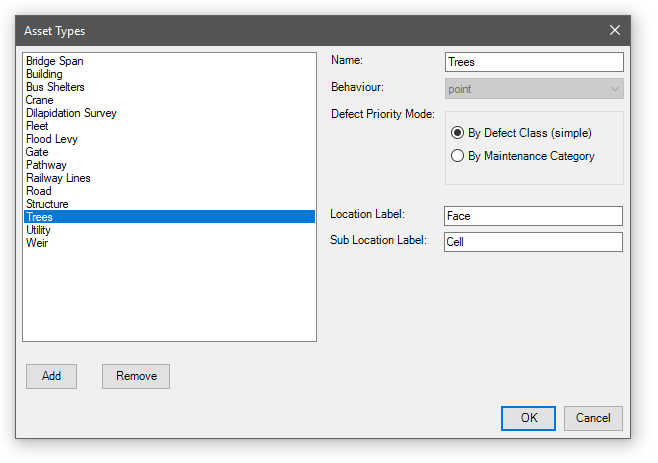 When creating a new asset type, you will need to choose a behaviour. Point behaviour is used for assets that are located in a single location, that can be represented by a single set of GIS coordinates. Examples of point assets are bridges, culverts, trees and bus shelters. Linear behaviour is used for assets that span a large distance in a linear fashion, and can be subdivided into segments. Examples of linear assets include roads, footpaths, railway tracks and sewer pipes.
Defect Priority Mode defines how the software will automatically suggest a priority when logging a defect. In the simple mode, defect priority is defined by the defect type. In the more advanced mode, defect priority can be configured specifically by maintenance category. The latter mode is useful for road assets.
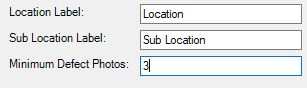
You can customise the labels for the "Location" and "Sub Location" fields on components and defects, for added control.
You can also specify a minumum number of photos required for defects. For example, if you set Minumum Defect Photos to 3 then you won't be able to sign off an inspection until all defects have at least 3 photos.
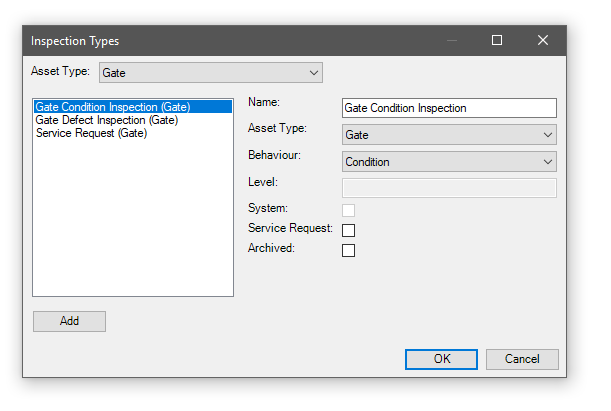
Once the asset type has been created, inspection types, custom fields, and the methodology need to be set up. See Section 2, parts 8, 9 and 11 of this manual for more information.
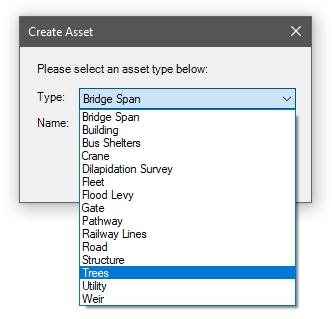
Once the asset type is defined, users will be able to create assets of this type in the usual way, from the File | New | Asset menu item.
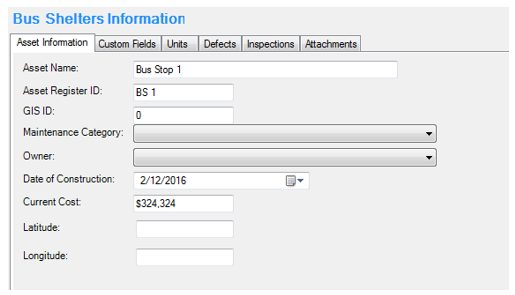
 Custom assets with a “point” behaviour behave somewhat like structure assets. You can define maintenance category items, and store date of construction, current cost, and GIS coordinates.
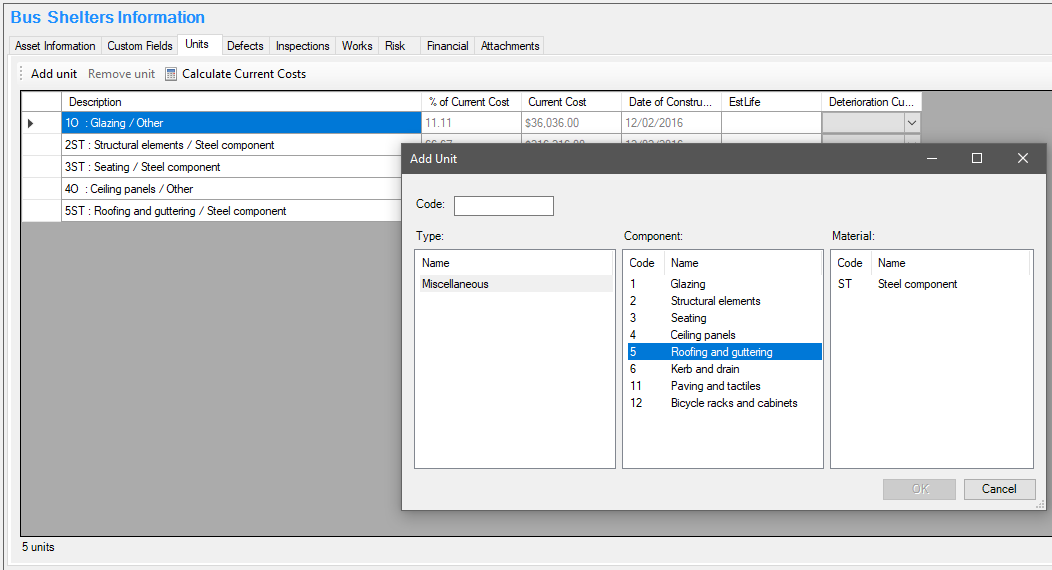
 Components can be added to the asset in the Units tab.
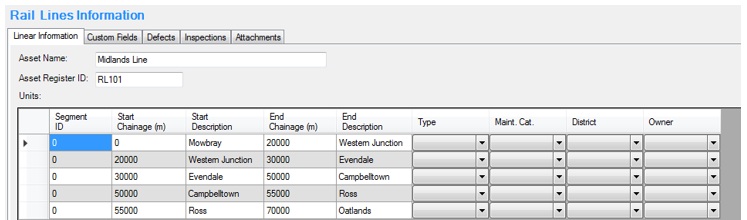
 Custom assets with a linear behaviour behave much like roads and pathways.
 Custom assets with a “point” behaviour can be inspected using simple or condition inspections.
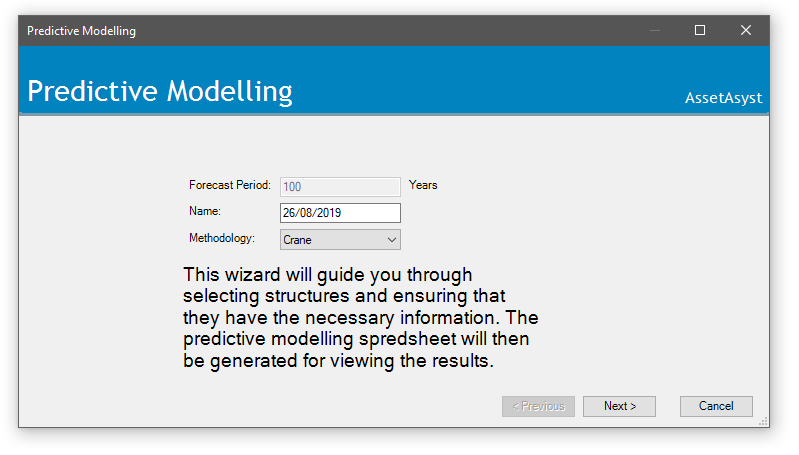
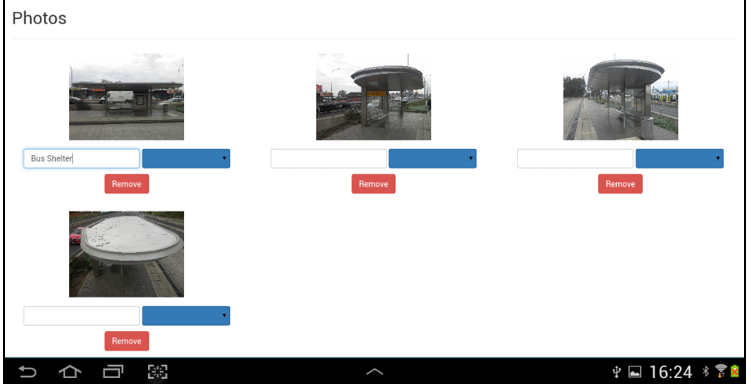
 Custom assets with a behaviour of “point” can be used in the predictive modelling module, and can be inspected using the mobile tablet inspection app.