
Methodologies
Methodologies define how an asset is inspected. Each asset type comes with its own methodology. You can specify multiple methodologies for structure assets. (Two pre-defined behaviours exist for structure assets – VicRoads and Queensland).
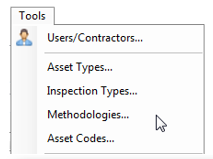
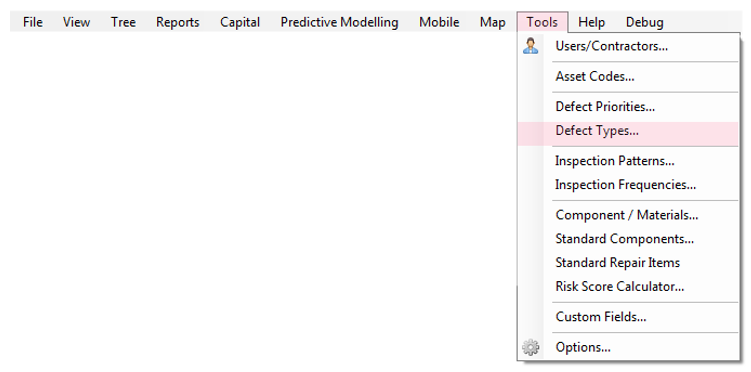
You can define methodologies in the Methodologies option from the Tools menu.
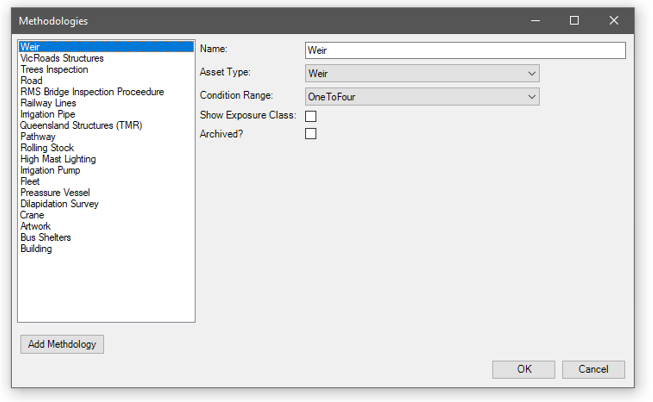
A methodology can be configured to assess components on a one-to-four scale, or a one-to-five scale. You can choose whether to include exposure class in your methodology. Exposure class defines the aggressiveness of the environment of a component.
Creating the methodology, as above, is only the first step. A methodology is defined by its components, defect types and repair items.
Components
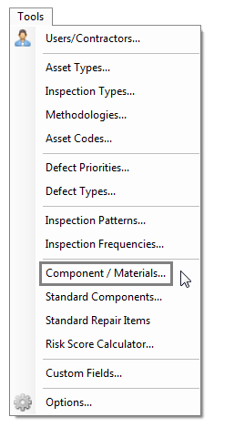
Components form a key part of AssetAsyst®. Components are defined in the Tools menu under Component Materials. (They were previously listed under Components in the Asset Code screen.)
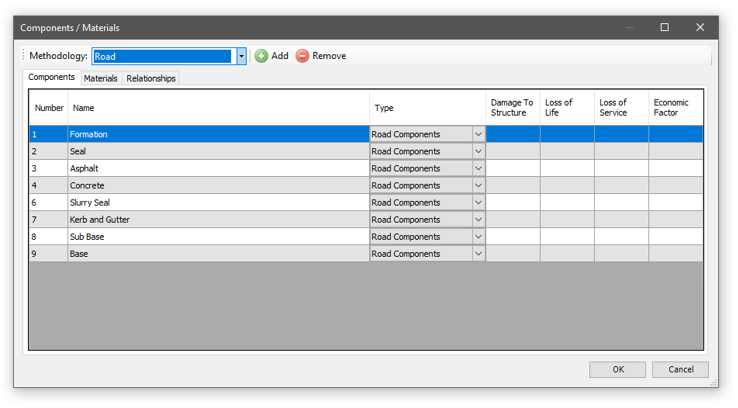
Once the component / materials form opens, select your desired methodology.
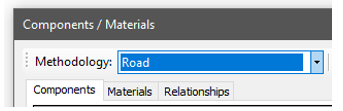
You will notice that this form provides three tab pages: components, materials and relationships.
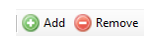
The first step is to define the components for this methodology. Use the Add button to add a new component.
Each component needs a unique number and a name. Components can be categorised into types which can be selected from the Type column. These types can be defined from the Tools | Component Types menu item.
The last four columns are specific to structure assets and define risk factors that contribute to the overall structure risk score.
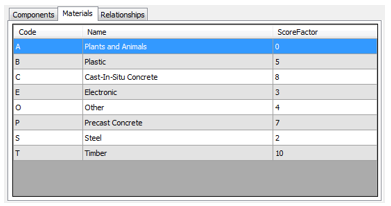
In the materials tab, you can define the various materials that components can be constructed from.
The final step is to relate the components to the materials. For example, you could relate the component Mast (5) to the material Pre-case concrete (P) to create the component 5P. If you also related masts to another material, such as Steel (S) you would have a new component 5S. The code is automatically generated by combining the component number and the material letter, but you can use the alias column, to define your own code to these components.
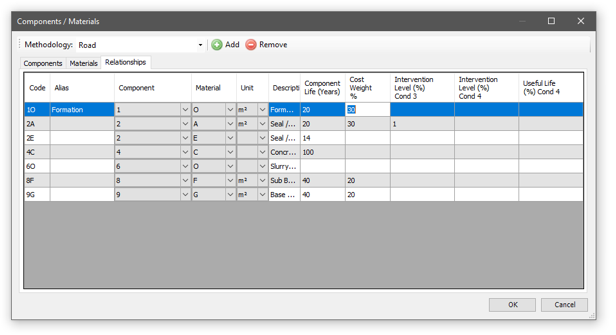
For each of these component/material relationships, you can specify a component life in years. The four remaining columns are used by the predictive modelling tool.In simple mode, the priority is specified once for the given defect type.
Cost Weight % represents the percentage of the overall asset that this component generally makes up. This allows AssetAsyst® to automatically apportion asset cost amongst components. Intervention Level Cond 3% represents the percentage of a component that, once in condition 3, will trigger an intervention. For example, if we enter 50, then once 50% of the component reaches condition 3, the predictive modelling tool will indicate that intervention is required for the component. Intervention Level Cond 4% represents the percentage of a component that, once in condition 4, will trigger an intervention. For example, if we enter 10, then once 10% of the component reaches condition 4, the predictive modelling tool will indicate that intervention is required for the component. Functional Limit Cond 4% represents the percentage of the component that, once in condition 4, will indicate that the component has reached the end of its functional life. For example, if we enter 20, then once 20% of this component reaches condition 4, the predictive modelling tool will indicate that the component is no longer functional.
Defect Types & Repair Items
AssetAsyst® allows you to pre-configure defect types and repair items. These work together to make the job of logging a defect easier.
Defect Types
Inputting information about Defect Types into this form enables the software to automatically determine unit of measure, and can pre-fill a defect description.
Select a methodology. A list of defect types will appear in the list.

You can add a new defect type, or delete one, using the buttons underneath the list.
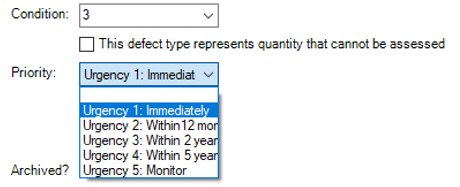
You can set the name, default problem text and condition. You can also specify which categories (safety, maintenance and capital) this defect type is relevant to.
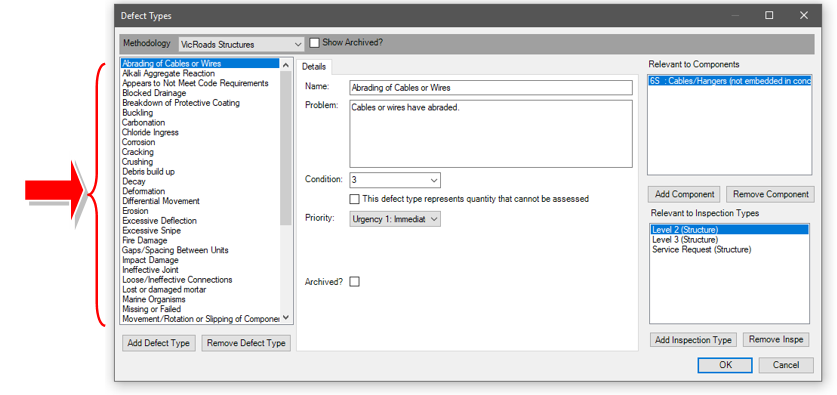
On the right-hand side of the form, you can select which components this defect type is relevant to. Use the “Add Component” and “Remove Component” button.
Priority can be set for this defect type in one of two ways. You can switch between these methods in the Asset Type screen (Tools | Asset Types).
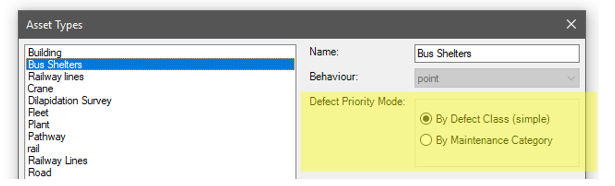
In simple mode, the priority is specified once for the given defect type.
In Maintenance category mode, a new tab appears on the defect type form. This allows priority to be specified separately for each maintenance category. This mode is of particular use for road assets.

Repair Items
AssetAsyst® allows you to pre-configure standard repair items, which will make logging a defect easier.
As with defect types, select a methodology. A list of repair items will be displayed in the list. Use the ‘Add Repair Item’ and ‘Remove Repair Item’ to maintain this list.
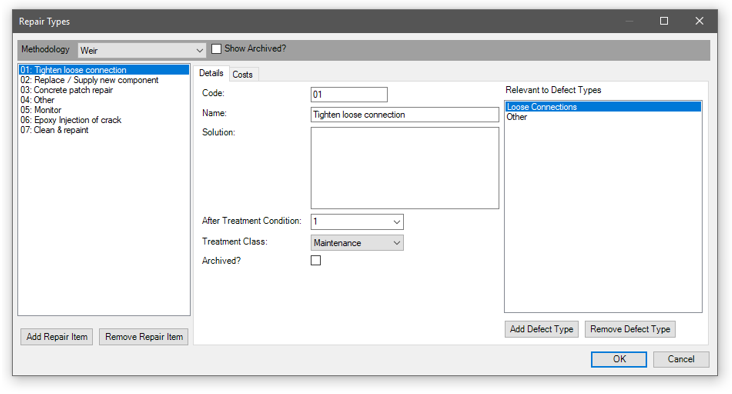
By clicking on a repair item, you will be able to edit its code, name, and suggested solution text.
The list on the right-hand side lists which defect types this repair item is expected to overcome. For example, the repair item “01: Tighten loose connection” may be used to resolve the defect types “Loose Connections” and “Other”. Use the ‘Add Defect Type’ and ‘Remove Defect Type’ buttons to maintain this list.
Click on the “Costs” tab to set the expected repair costs for this repair item. Repair cost is specified per component, per maintenance category.
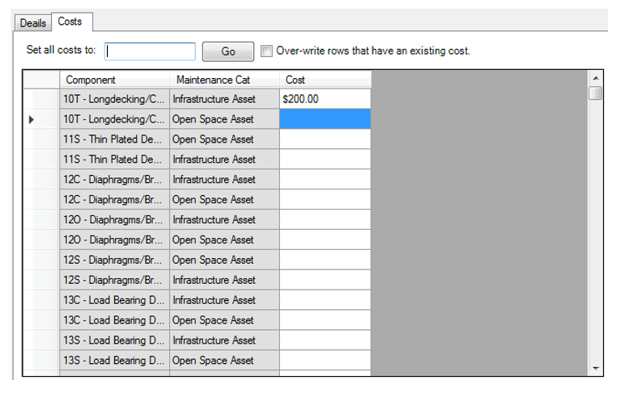
Since this combination of component / maintenance category may create a long list of costs that need to be entered, the software provides a tool that helps you bulk set costs to a common value.

Enter a cost into the “Set all costs to” textbox. Then click Go. This will apply the cost you entered to any cost box that is currently empty. If you want to override existing cost values as well, tick the “Over-write rows that have an existing cost” checkbox.
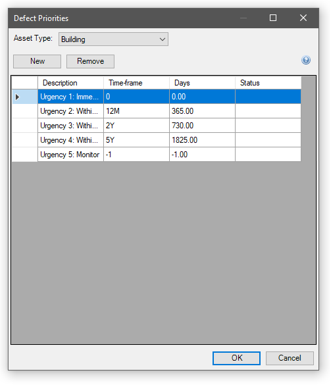
Defect Priority
The Defect Priority list is designed to work with the Defect Types form. The first time you open this form you will notice default priorities already entered. Defect priorities are global, and are not specific to a particular methodology.
You can add your own or overwrite the default priority values by clicking in the description cell and then entering a value as per the instructions on the form.
NOTE: If you are using a risk score combined with a road maintenance category to determine response time. Please see Section 3 - 4.5 Risk Assessments.