
Defects
AssetAsyst® is capable of recording multiple defects and storing historical information about the location, dates and other critical details about each defect.
AssetAsyst® can cater for most recording scenarios including; routine inspections, one-off site inspections, higher authority inspections, customer requests, night inspections, annual audits, etc.
Before recording a defect in system, at least one Defect Type must be saved in the Defect Types. Defects can only be recorded against an inspection that has at least one unit attached.
Defect Tree
The defect tree displays all defects that are unmitigated for all assets. The tree displays asset type, defect category, component, defect type and then individual defects. The numeric count in the bottom right of tree summarises the number of defects that are outstanding at any time.
Defect Location
No Map
Users can record defects directly through the Inspection Information form or via the map pane.
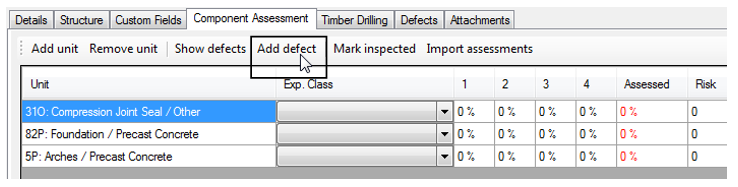
To record a defect through the Inspection Information form, select an inspection set, go to the Unit tab (Component Assessment tab for condition inspections), locate and select a unit (or component for Bridge assets) and then click on the Add Defect button.
NOTE: Structure assets and custom points assets that have location details will automatically set the defect location to the same point.
Using Map
Without GPS
 To add a defect using the map, select an inspection set, click the Defect tool on the map tool bar, and select a defect type from Safety, Maintenance or Capital. Then, left click on the location the defect will be recorded at. If the location is close enough to an asset the software will open the Add Defect form. If not, it will invite the user to indicate a new location – closer to an asset.
With GPS

To add a defect using the map, select an inspection set, ensure the GPS is connected and click one of the three highlighted icons. If these icons are not visible it means the GPS has not successfully connected. Check the settings in the option screen to ensure your GPS is connecting correctly.
The colours on these icons relate to the three defect categories: Safety (red), Maintenance (orange) and Capital (green). The software will try to place a defect at the location of the GPS. If the location is close enough to an asset the software will open the Add Defect form. If not, it will invite the user to indicate a new location – closer to an asset.
Defect Details
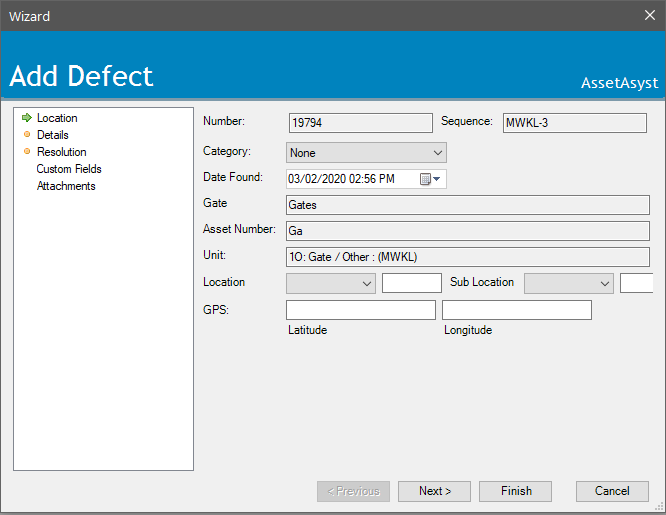
Adding a defect will open the Add Defect wizard, where information regarding the defect can be input.
Defect Location Information
Firstly location information is entered for the defect, including GPS coordinate. This will be entered automatically for bridge assets if the structure has a location, and for a road asset when the defect is created using the map (with or without the GPS function). For road asset types, a chainage for the defect can also be entered along with its location (i.e. roadside / roadway) and the carriageway the defect is on. Pathway assets have room to input and address for the closest property to the defect. For bridge defects the location of the defect on the structure can be specified (i.e. abutment / pier / span / widening / etc.). Building defects only need the GPS location of the defect. Custom assets have user-defined location and sub-location lists with customised labels.
For linear assets (road and pathway) that are added through the map, AssetAsyst® will auto-calculate two possible chainages for the defect. These chainages represent either direction along the segment since AssetAsyst® cannot determine which direction the geometry is logically facing. For example, if you add a defect 10% along a segment whose chainage is 100-200, AssetAsyst® will give you the calculated chainages 110m or 190m.
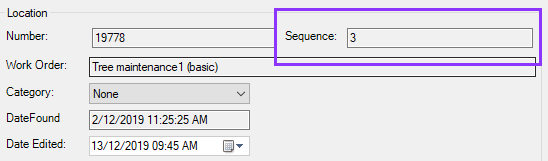
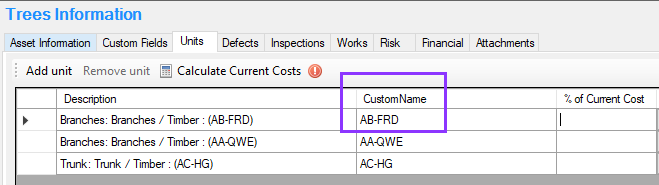
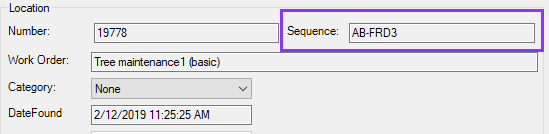
Notice that AssetAsyst will generate a globally unique defect number for the defect, but for custom assets, also a Sequence number. The sequence number is relative to the component to which the defect belongs. The sequence number is made up of the component name plus an incrementing number.

Defect Details
Following inputting the defect location, details of the defect are entered. If configured (see Section 3 above), when the user selects a Defect Category (on the previous step) and a Repair Item, the estimated priority will be auto-calculated based on the unit’s maintenance category. Also, when an estimated quantity is filled in the cost of the repair will be auto-calculated. These values can be changed by the user. The user is also required to fill in the remaining details for the defect including an estimate of the risk (see below), and a description.
Depending on the configuration, certain fields can be enforced, meaning you cannot add a defect without filling in these fields.
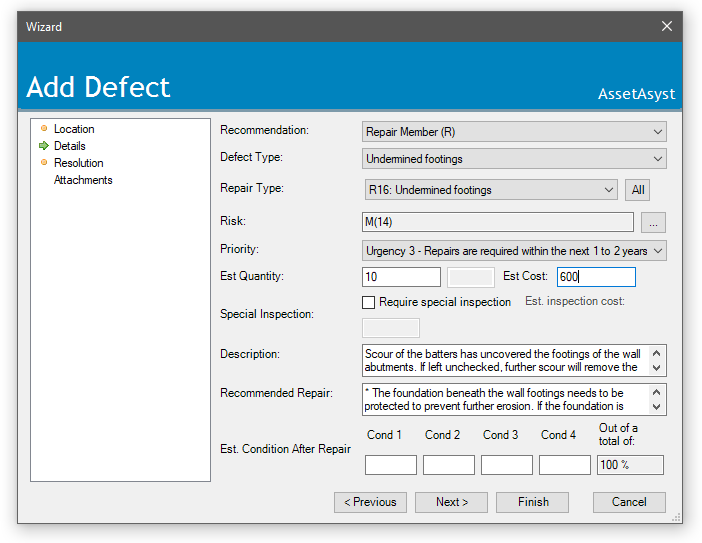
For structure defects, there are additional fields for Recommendation and Recommended Repair. Structure defects also allow for the entry of an estimated component condition after the defect has been repaired.
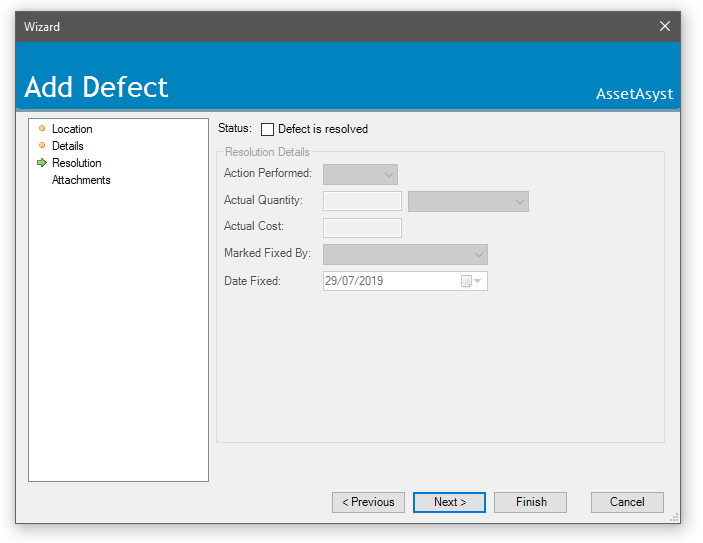
Defect Resolution
During inspections, defects may be found and fixed onsite and should not appear to the works manager except in a compliance report. So the Defect Resolution step is used to add details of actions performed by the inspector and the date and time of closing.
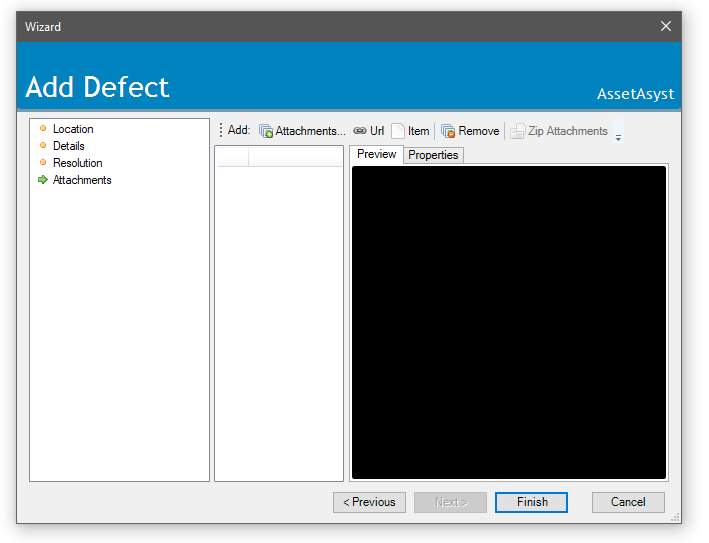
Defect Attachments
Attaching photos and documents to a defect record is achieved by click the Attach item button and selecting a file to add. The attachments will be available for all users to see.
There may be a specified minimum number of defects that have to be added. This can be configured at the asset type level.
Defect Proximity Reminder
AssetAsyst® has an inbuilt system to prevent the same defect being duplicated in the system.
If a defect is added in close proximity to an unmitigated defect, AssetAsyst® will remind the user that the defect is in range using the Defects Within Range form.
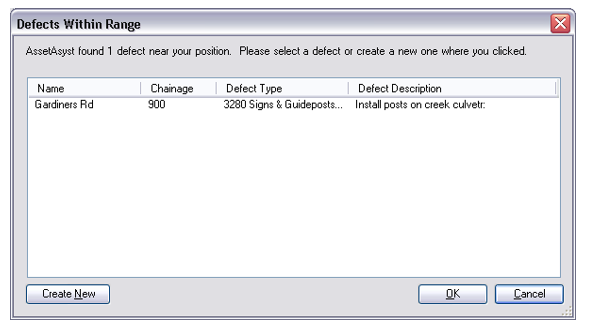 Users can choose whether the defect is a new defect by clicking the Create New button. If the defect is not a new defect, the user may select the defect from the form and click the OK button and edit the defect details using the Edit Defect wizard.
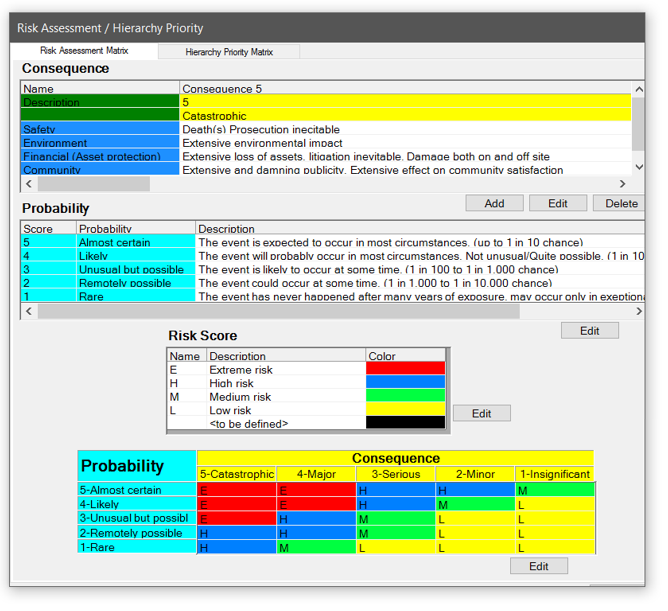
Risk Assessments
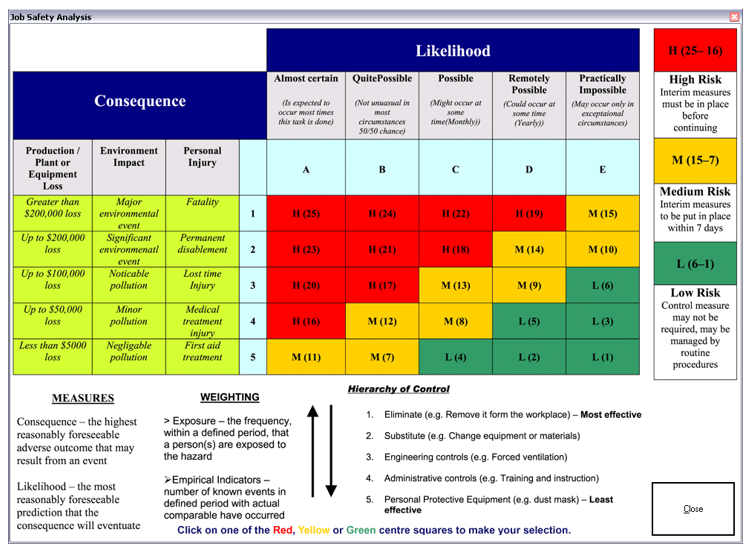
Defects can be assigned a Risk value based on the inspectors’ evaluation of the defect and site conditions.
To enter a risk score, assess the likelihood and consequence of an event occurring then click on the cell that matches the risk profile of the defect. You will then be able to prioritise works based on the inspectors observed site risk score.
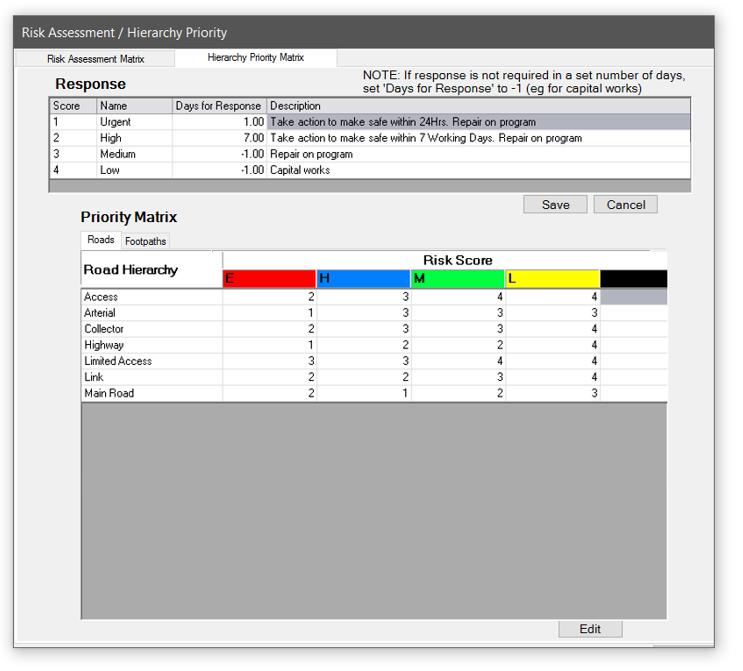
NOTE: The risk score associated with each defect will not automatically affect the automated response. The response will still be dictated by the defect category, defect type and the unit maintenance category as configured in the Repair Item form.
Defect Sequence Numbers
When logging a defect on a custom asset, a sequence number will be assigned. Each component on the asset will have it's own sequence of numbers. For each defect you add, the number is incremented. For example, a defect with a sequence number of 3 will be the third defect ever logged on this component.
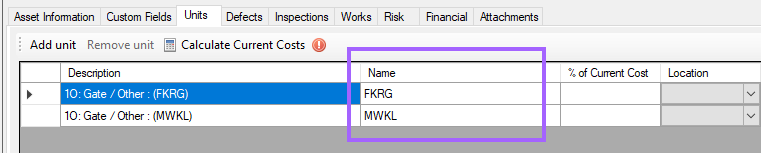
AssetAsyst allows you to specify a custom name for a component on a custom asset. If you have given the component a name, this name will be used as a prefix for the defect sequence number.
Defect History
Historical changes to defects are logged over time. This can be viewed from the history tab on the defect info form. Note also that custom fields are historically tracked.
